Notice
These documents are currently work in progress and describe a product currently in beta testing.
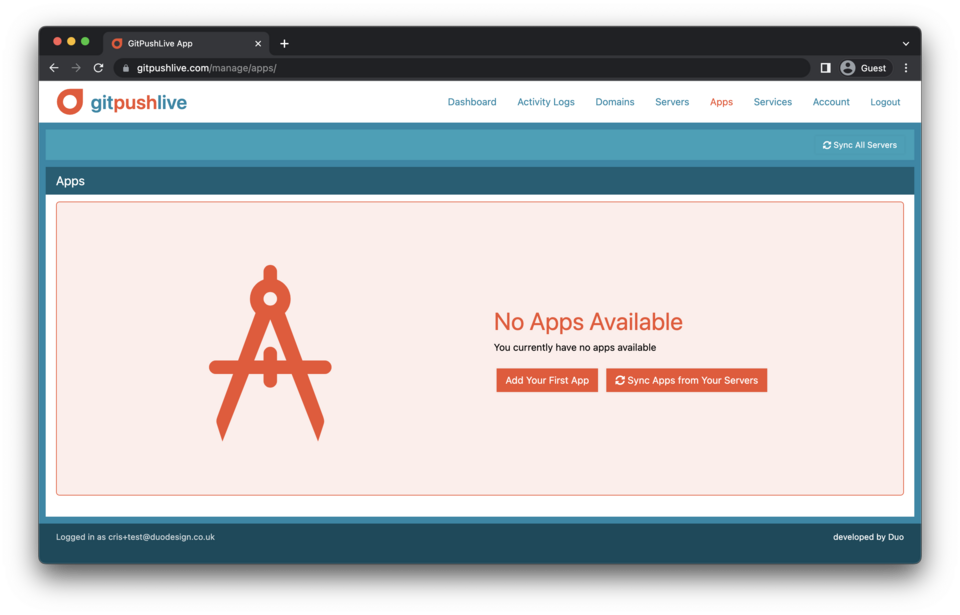
Apps
Apps within GitPushLive are environments run inside Docker Containers that execute your code on your servers. They are created by pushing your code with Git to your server. The whole process of setting up apps, updating apps and linking apps is all controlled by Dokku.
The instruction below give an outline of how the GitPushLive control panel works in conjunction with Dokku to allow you to manage your apps.
Creating Apps
Apps can be created within the apps control panel or by pushing code to a specific branch remote branch from git.
Creating with the control panel
Creating apps via the control panel can be done by clicking “Add Your First App”, or selecting the “+” button at the top on the list with the apps section of the control panel
Once clicked add is clicked you’ll be asked to choose which server to add the app to, and to name your app. App names need to be unique per server and should be kept to short alphanumeric names and they’ll form the prefix to the server domain.
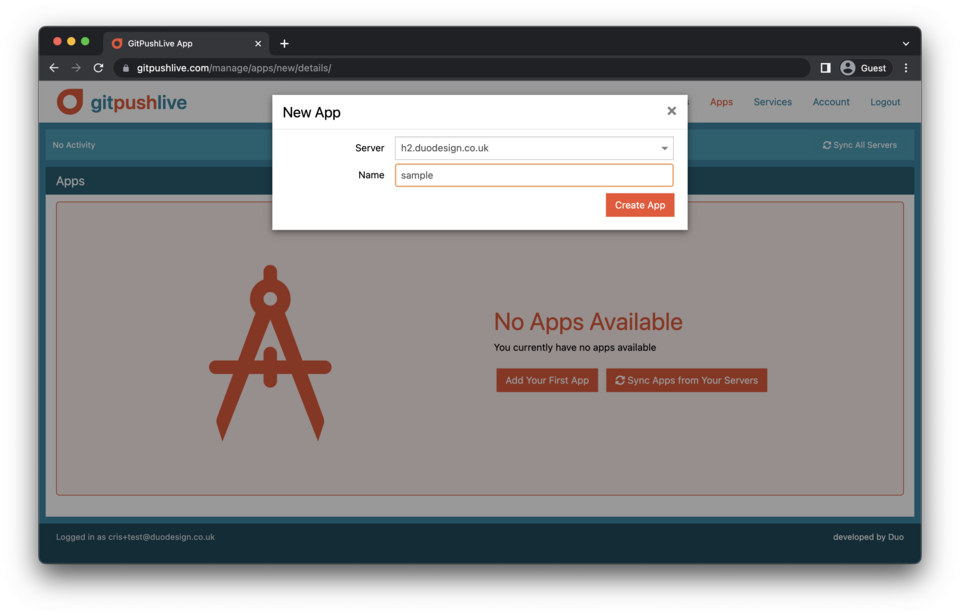 Clicking Create App will create an empty app, ready for your to push your code.
 Note, the above steps are optional. Just pushing code from a computer with a valid ssh key will also create the app. Its sometimes useful to create the app first, so you can pre-link database etc before deploying code.
Pushing Your Code
To push your code, you’ll need to add a new git remote to your projects directory.
You can do this by opening a shell and navigating to your projects directory. Then add the git remote with
git remote add live dokku@yourserver.com:yourappname
The your can push your code with
git push live
Controlling Apps
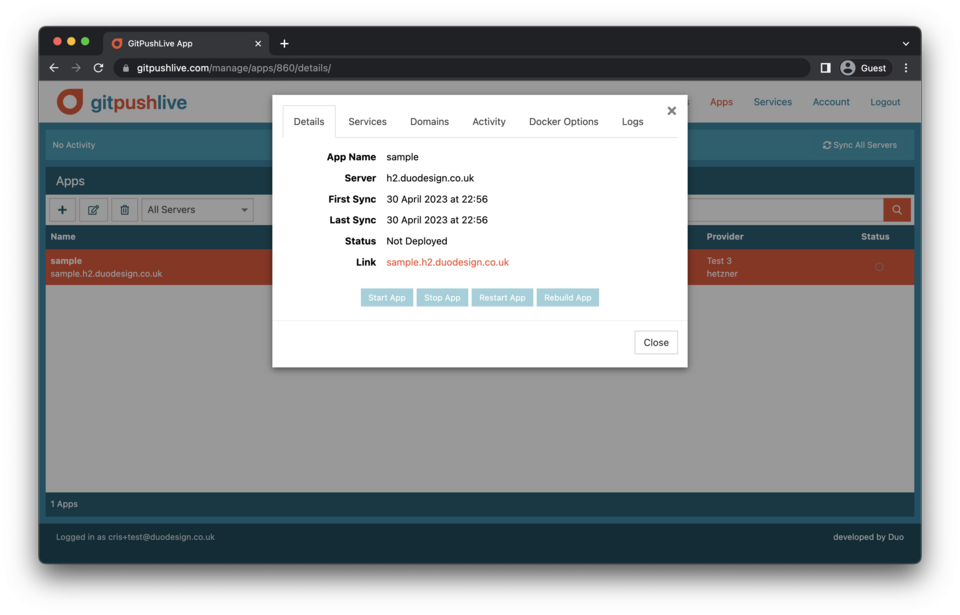
Apps can be controlled using the usual dokku commands but if you’re not at your workstation apps can also be started, restarted, rebuilt, and stopped from with the apps control panel.
This can be done by double clicking on an app within the list. At the bottom of the details tab there are buttons for the above commands. Once clicked, these buttons will trigger the dokku command on your server.
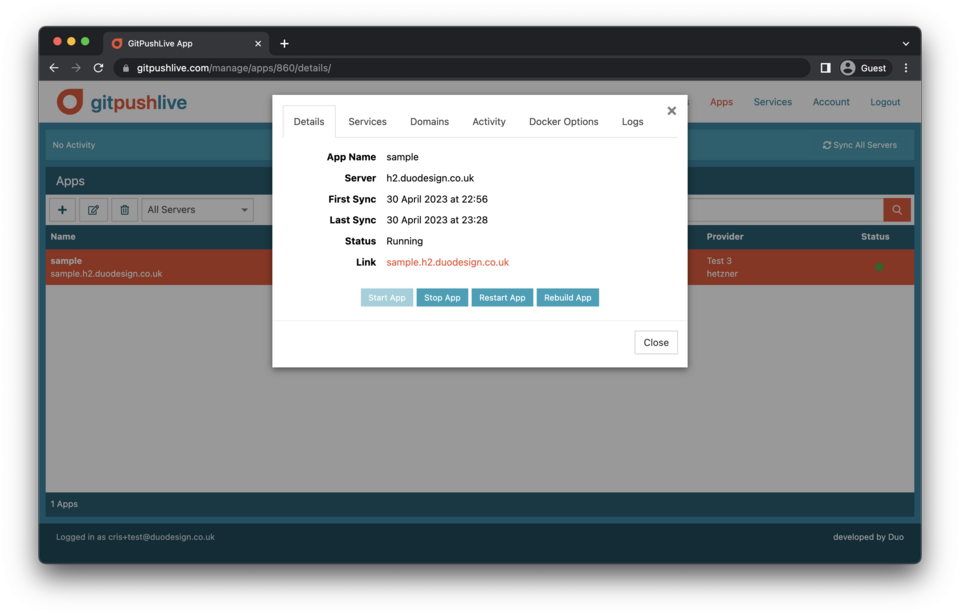
You can see the output of the command within the logs tab.
Adding Services - eg linking a database
Services can also be managed though the GitPushLive control panel.
To add a service to an app, open the app details from the apps list. The open the “services” tab.
 You can then click “Add Your First Service” to add the first service to you app.
 Using the “Type” dropdown, choose from the service plugins available, enter a name and click “Save”. For best results keep your service name simple. It’s fairly common just to re-use your app name for your databases. Once save has been clicked you can watch the logs to see the progress of your service creation. Once created it will be automatically linked. If a service of that type and name already exists on your server it’ll just be linked.
Once created your linked services can be controlled via the usual dokku plugin commands or with the controls added to the services tab.

To access this new service from within your app you’ll need to connect to it using an injected environment variable. This is typically DATABASE_URL eg mysql://mariadb:368b64754808aa33@dokku-mariadb-sample:3306/sample however this can vary from service to service. Your programming language / database library should have a way to utilise these database urls.
App SSL Certificates
If you install the Lets Encrypt plugin when setting up your server, you can add SSL with a single click.
Please note, when using Lets Encrypt on your server we will set the default email address to the one in your account and automatically agree to their terms. The email will be used by lets encrypt to send you reminders if your certificate are not renewed. The certificates last 3 months, but will be automatically renewed by the plugin with one month to spare, so once every two months.

To add a certificate, just click the “Add SSL” Button. You can then click the logs tab to view the certificate creation and installation process. This should take a few seconds to confirm your domain is configure correctly.

Returning to the services tab, you should see the new Lets encrypt service with the expiration date of the certificate. As mentioned above, these will auto renew before expiration.
If you have added or edited any domains you’ll need to update your certificate. To do this use the lets encrypt service controls in the dropdown. See Managing App Domains below to see how to add and check domains before doing this.
 The “Revoke Certificate” option within the above drop down will remove the certificate, so your domain will no longer be available on an https connection.
Managing App Domains
You can manage which domains your app responds on by editing the list in the domains tab of your app details.
 Just adding domains to this list is not enough for them to work with your app. You’ll also need to ensure the DNS settings for that specific domain are updated to have “A” records pointing at your servers IP address.
If after adding the domain you want to check this, you can click the “Check Domains” button. This will but a green tick next to all correctly configured domains, but will show a orange alert next to misconfigured domains. Clicking on the dropdown, a message will indicated the issue.

For SSL to update correctly you should ensure all of the domains have a green tick before renewing the SSL certificate.
Activity & Logs
Activity Tab
The Activity logs shows the interactions you have had with your app. It shows the date and time when your app has been created, started, stopped and when code has been pushed.
Some of these event are recorded when your server sends information to the GitPushLive. As it is possible for these events not to reach our servers because of network issues or a badly configured firewall we can’t guarantee the activity logs are a 100% accurate and should be used as a guide.

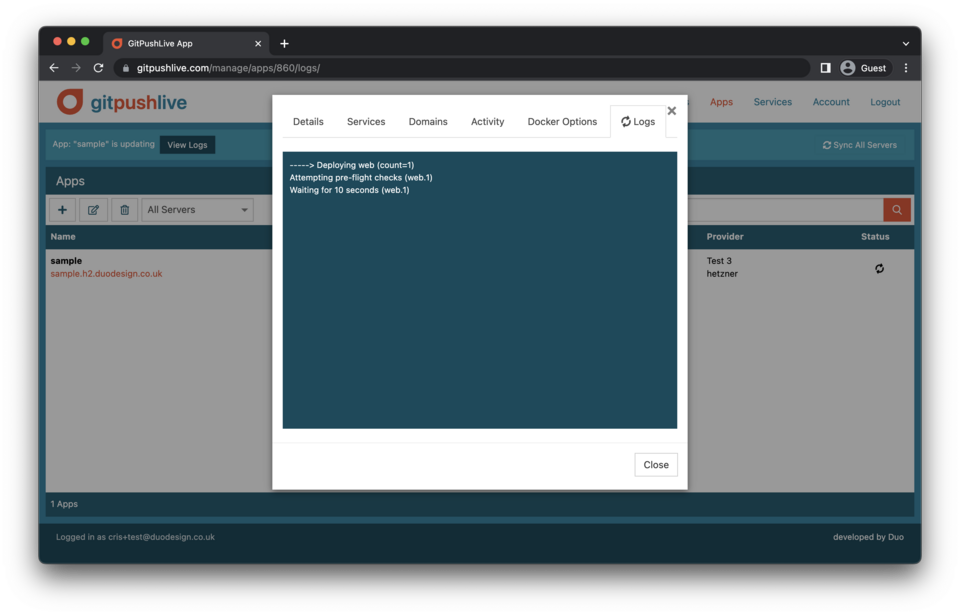
Logs Tab
The logs tab is there to show real-time information, often the output of command run against your app. It’s possible for Dokku plugins and your app to expose sensitive information from their build output, so we don’t save or buffer these logs. Instead we just pipe them through to users who have access to server the app is running on. If you refresh your browser during a command being run, you will only see logs that were sent after the refresh for this reason.
Deleting Apps
Apps can be deleted from within the apps list view. Just click the app within the list and click the trash icon. A small confirm pop-up will appear for you to confirm the deletion of your app.

Note, deleting an app will not delete linked databases. Instead you’ll need to go into the services section of gitpush and delete those manually. As all of your apps are maintained via git, it should be possible to recover your apps by re-pushing them and re-linking them to their services, if you deleted them by mistake.