Notice
These documents are currently work in progress and describe a product currently in beta testing.
Server Providers
You can link your account to various server providers, allowing GitPushLive to create and manage servers using their provided api’s. Providers can be added through your GitPushLive dashboard.
Below are instructions for setting up each available provider, in addition to the process of adding a custom server if your server host is not included as a supported provider.
Digital Ocean
Linking with digital ocean is done through oAuth. All you need is a digital ocean account. If you don’t currently have one you can sign up here.
You then need to click add provider within our GitPushLive dashboard, choose Digital Ocean, give the provider a name and tick the scopes to choose if you want to manage DNS & Servers through Gitpush. Clicking authenticate will take you through to Digital Ocean, so you can login there and authorise GitPushLive to manage your Servers / DNS.
Akamai (Linode)
The Akamai Api can be connected to using oAuth. For this to work you’ll need an active Akamai/Linode account. If you currently don’t have one, you can sign up here.
You then need to click add provider within our GitPushLive dashboard, choose Akamai, give the provider a name and tick the scopes to choose if you want to manage DNS & Servers through Gitpush. Clicking authenticate will take you through to Akamai, so you can login there and authorise GitPushLive to manage your servers / DNS.
Hetzner
To use Hetzner cloud and DNS you will need first an account. If you don’t have one sign up here.
Servers
To allow us to help you setup new servers you’ll need to generate an api key after logging into Hetzner Cloud. Servers within Hetzner Cloud are grouped into projects. Any API keys you generate are limited to those projects, so if you’re only using GitPush with new servers you can create a new project for that purpose.
Click the new project and the select the key icon in the left column (security), then the API tokens button at the top.
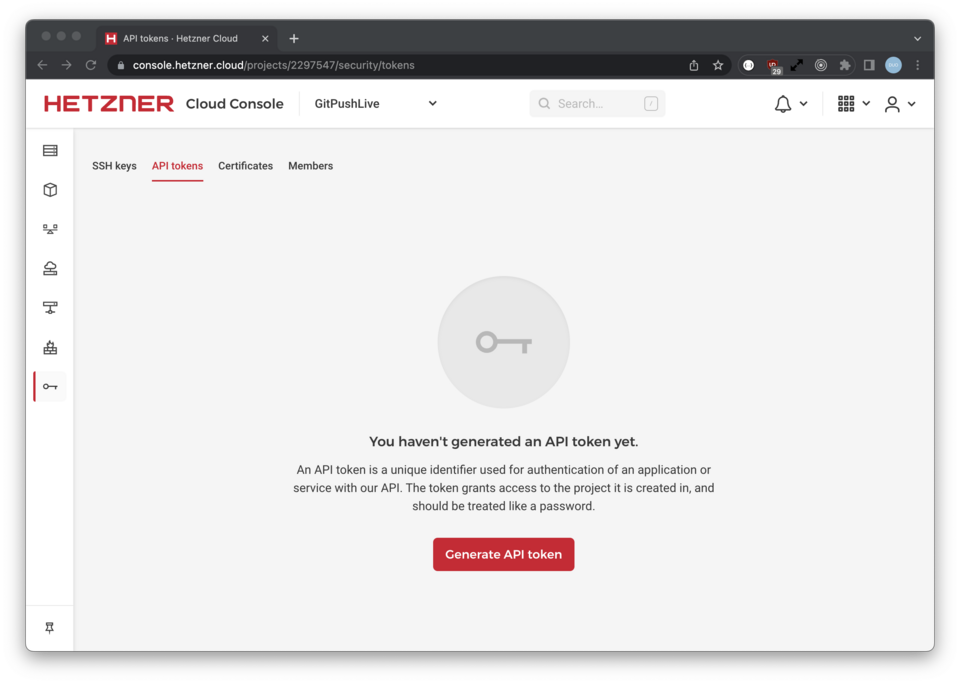 You can then click Generate API token to create your first api key.
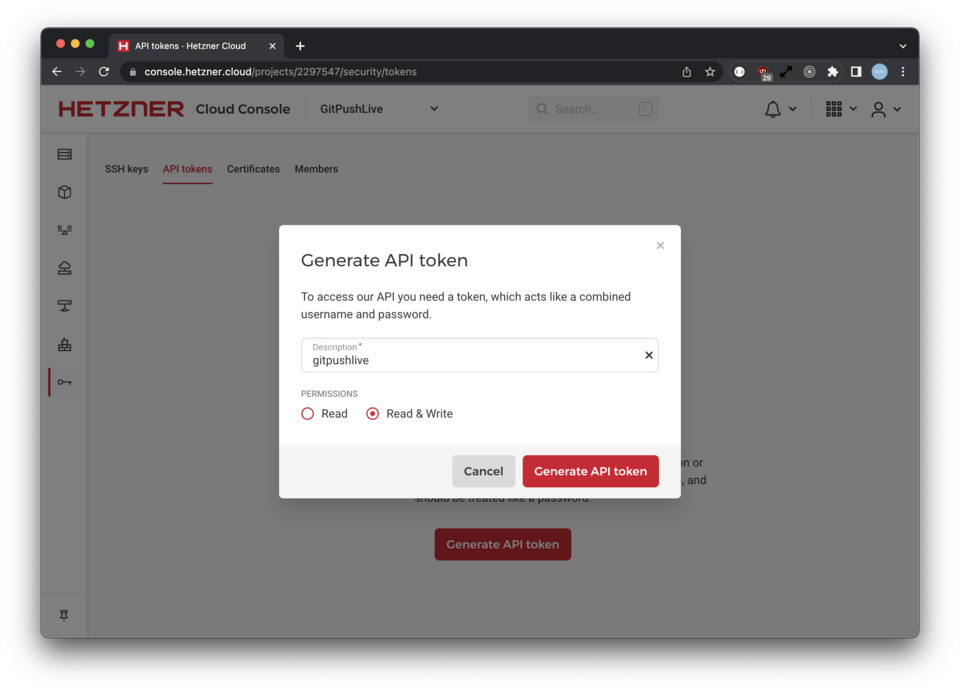
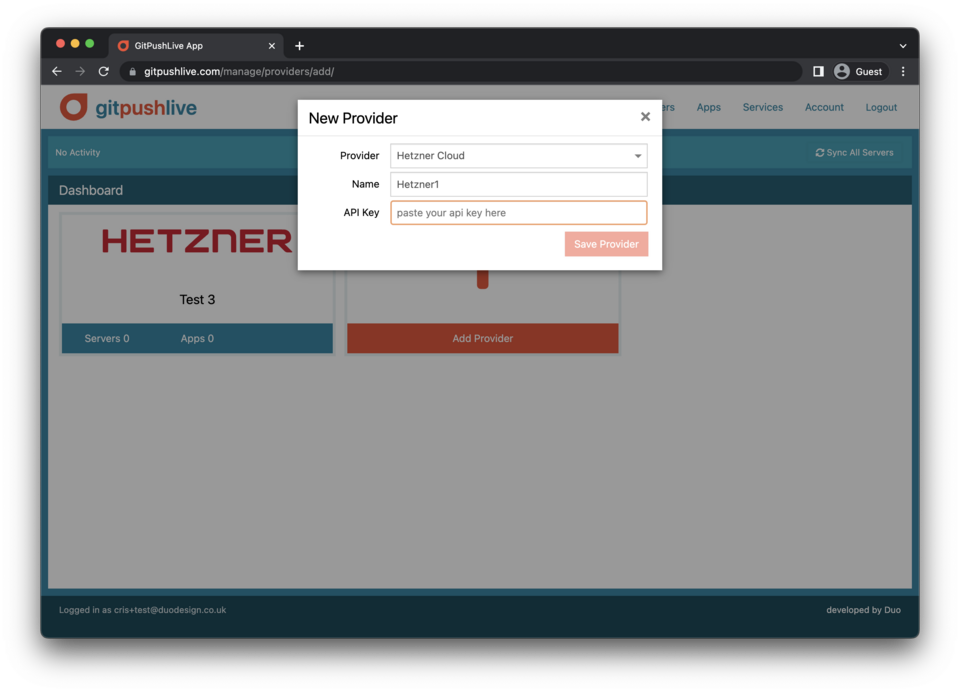
You’ll need to set it to Read & Write to be able to add server via the GitPushLive control panel. Give it a name (eg GitPushLive) then click Generate API token You can then copy the token into a new Hetzner provider on GitPushLive.
DNS
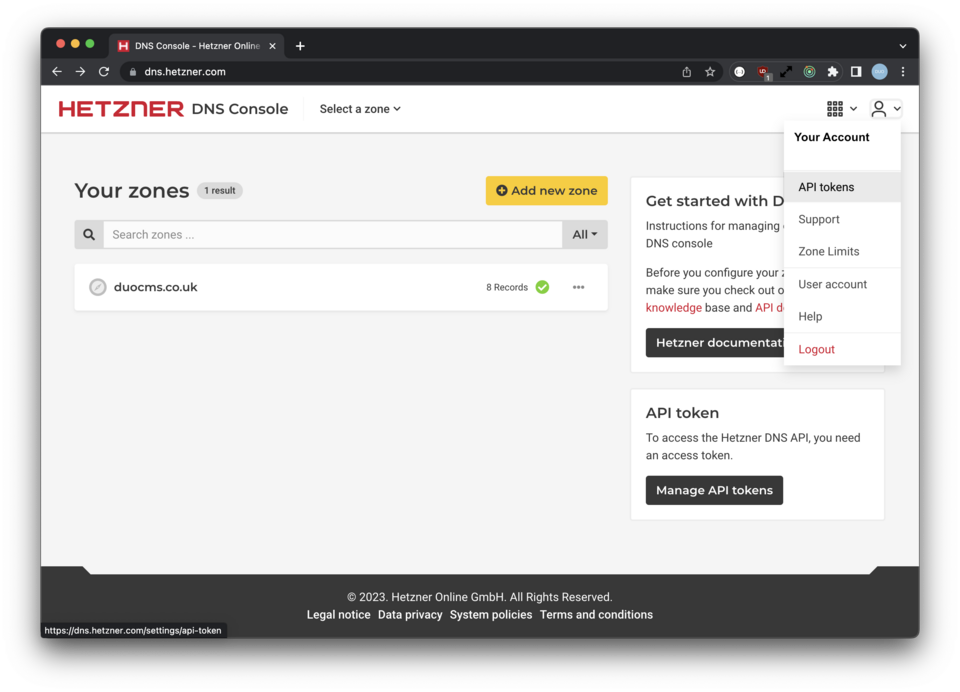
If you’d like to manage your Hetzner DNS settings, you’ll need to go here
You then can click on the Account Icon ( Top Right ) and select the API Tokens option.
Enter your token name, then click create access token
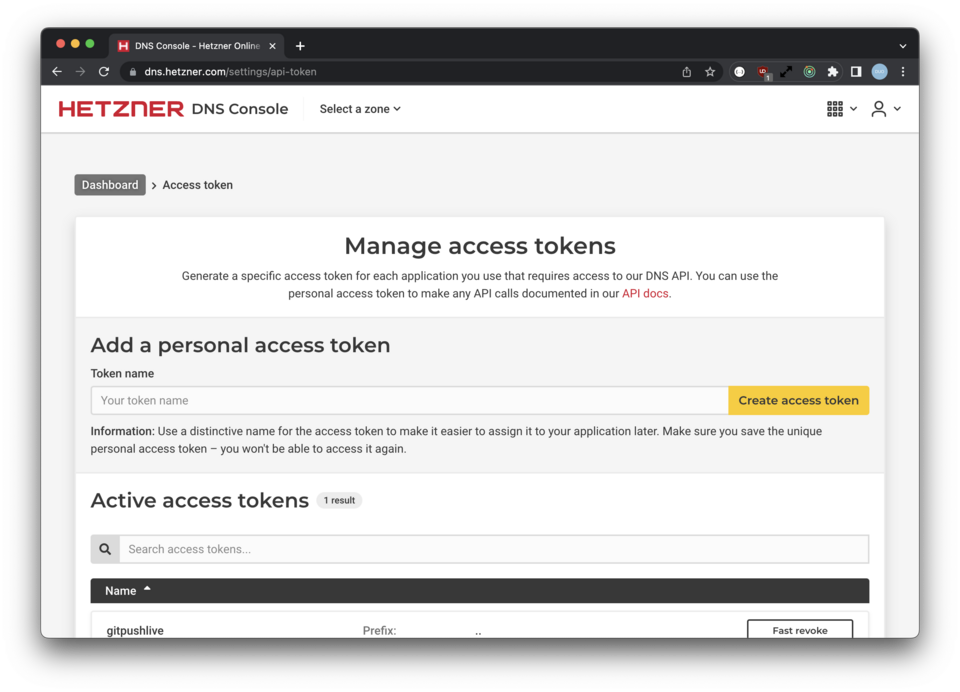 Copy the provided token, then…
Add a new Hetzner DNS Provider within your GitPushLive dashboard, pasting the token in place.

Once completed, you should be able to test your setup by clicking Sync All Servers (top right in GitPushLive) and it should sync across any existing domains and servers from each of your providers.
Vultr
If you don’t already have a vultr account, you can signup here.
Once signed up / in, you can create a new api key by going to account in the left menu and API in the top tab. Or click here to go there directly.
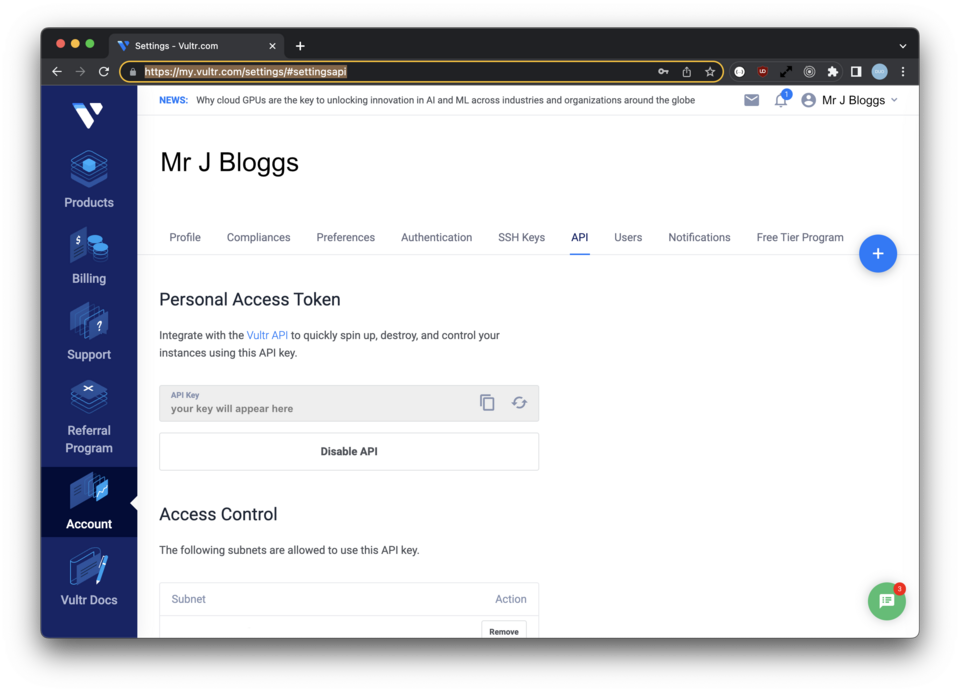
You’ll then need to generate and copy your api key. Also, in this panel you should restrict the ip addresses who can access your api. To allow GitPushLive you’ll need to add the ip adderss 178.79.165.12/32.
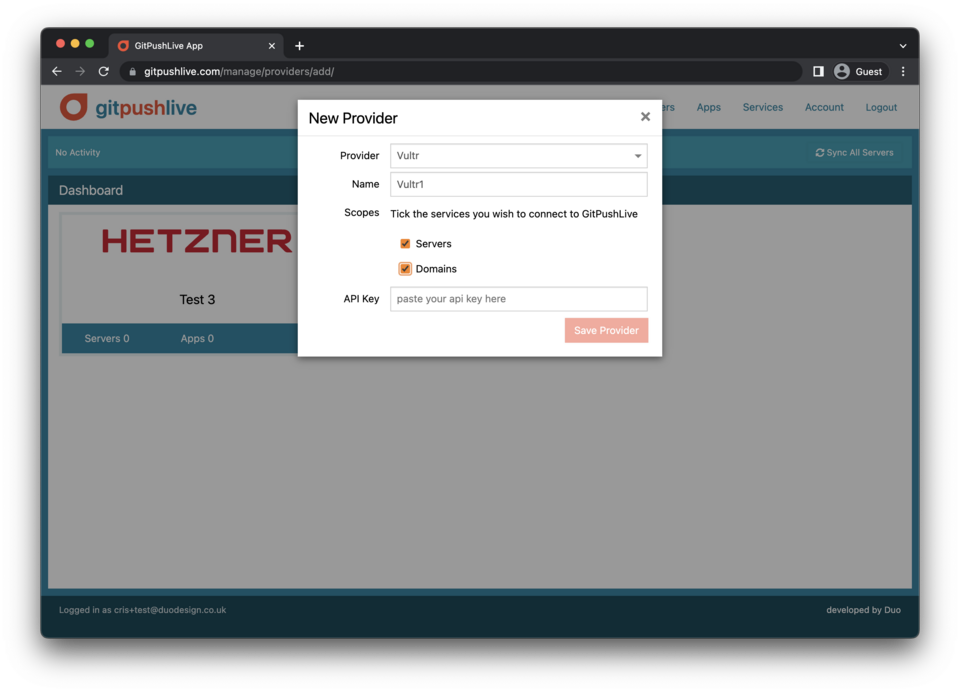
You can then paste your api key into a new provider within your GitPushLive dashboard. Tick which services you’d like available from Server / Domains.
You can then test these settings by using the Sync All Servers tool at the top right after saving your provider.
Amazon Web Services
We are still in the process of adding this provider. Please check back soon.
Custom Server
We can connect to and setup a custom server.
The server must be running a fresh installation of Ubuntu 20.04 / 22.04
The server must be accessible externally over the Internet.
The server must have root SSH access enabled, and you must have a root login.
Has at least 1 CPU Core with 1GHz, 1GB RAM, and 10GB Disk space.
To add your custom server, simply login, go to servers and click add. Then in the provider, choose “Manually Add Server”. Enter the IP address and click add server.
Once added, edit the server and click Setup Key.
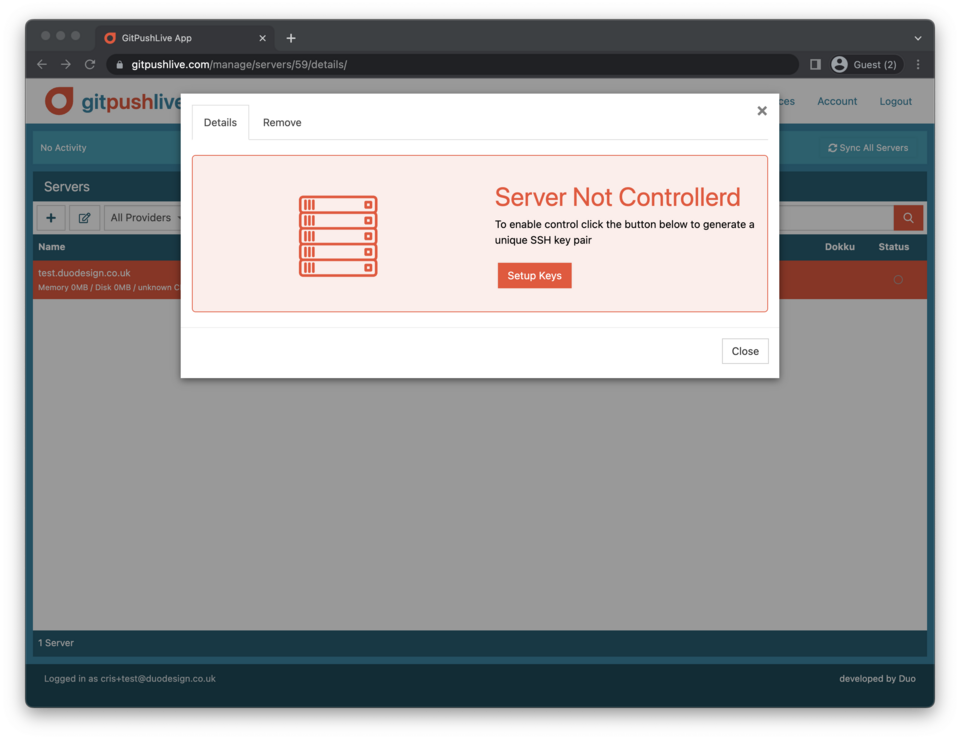
You’ll be then given a command you’ll need to run to add our ssh key to your server. Once run, you’ll then be able to test the key and proceed with the setup.