Notice
These documents are currently work in progress and describe a product currently in beta testing.
Domains
To run your websites and apps you’ll obviously need to point domains at them. To help you do this we’ve integrated our control panel with various DNS providers, these include
Akamai
Cloudflare
Digital Ocean
Hetzner
Vultr
To use any of the above providers, they’ll need to be in control of your domains, so they’ll need to be bought via a domain name registrar and the name servers changed to those documented by one of the above providers to manage them via GitPushLive.
Using A Wildcard Domain with a Server
Each server, when setup, needs a hostname. When developing your apps or accessing your server this hostname makes it much easier to access your server with via a familiar name as opposed to remembering an ip addresses.
One of the better ways to achieve this is to purchase a domain name specifically for your suit of servers. Then setup a sub-domain for each server. As an example, we could purchase a domain eg myserver.com, then each of our Digital Ocean servers could be called d1.myserver.com.
The setup would look something like this within the control panel.
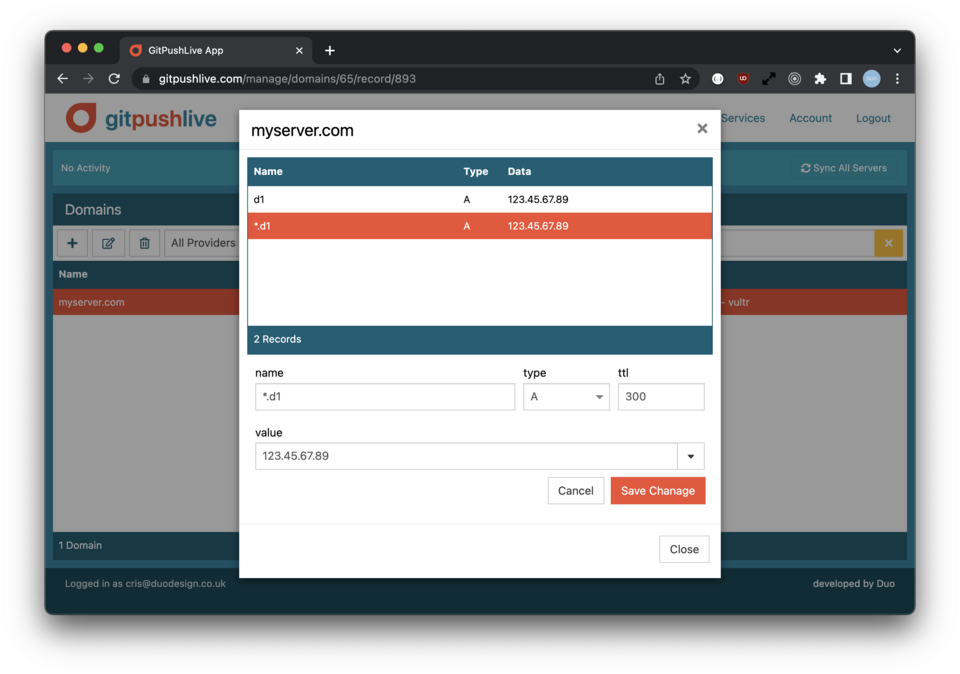
The above shows 2 records. One for d1.myserver.com and another for *.d1.myserver.com This allows you to setup various apps on that server and they’ll be accessible as yourapp.d1.myserver.com. Once your app is ready to be made live your able to point a custom domain at it (see below).
Linking A Domain To An App
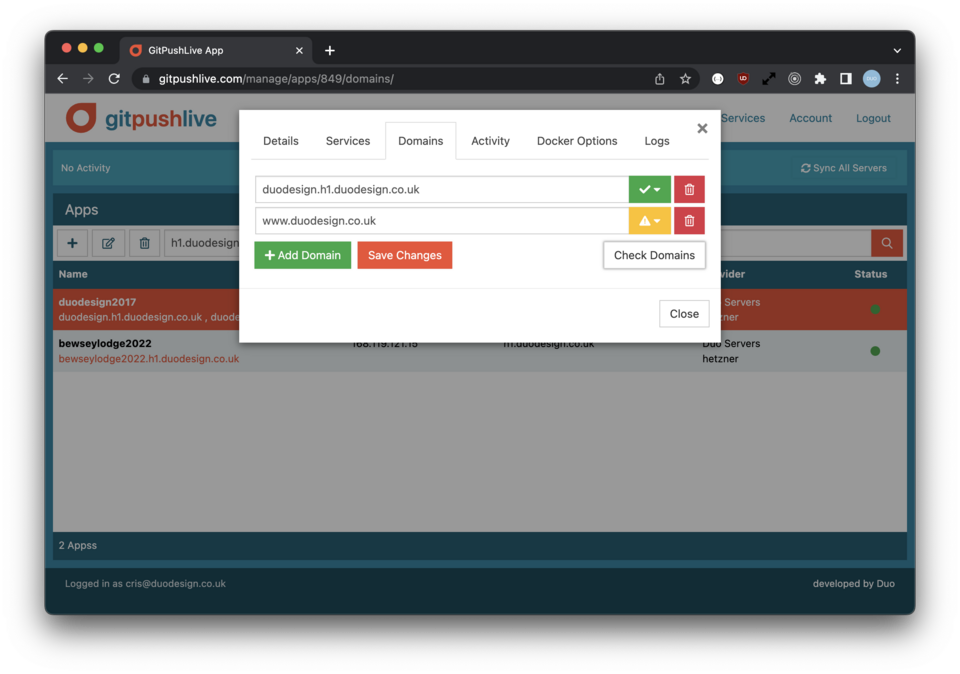
To link a production domain to an app, you’ll first need to update the app to accept the new domain. You can do this in the apps details panel under the domain tab. By default it will contain the default domain as setup by dokku, based on the app name + servers hostname.
Using the + Add Domain button you can add another entry into the list. This should be the full domain you’d like your website to appear at. The Check Domains button below the list can be used to check the domain you’ve entered is pointing at your apps server. If you click it at this point you’ll probably see something similar to below, as we’ve not yet updated the DNS settings.
You should save changes at this point, then head over to the domains panel to update your production domains A Record to point at your apps server ip address. You should be able to use the dropdown at the end of the value input, as it will contain the name of each of your servers and will auto populate the value with the correct ip.
If you don’t control the domain you’re setting the app up for, you may want to pass the ip address of your server to someone who does. Or if you feel you may need to manage the ip address going forward you can get them to setup a CNAME to point at a domain you do control. The intricacies of DNS are beyond the scope of these docs, though it’s something I’ll probably cover in a blog article in the near future.
Once the domain has been setup correctly, you can re-use the check domains button above to see when it has updated. DNS is a system which heavily relies on long cache times and the data is propagated between servers based on this, so it may take many hours before a domain is swapped over, and won’t update for everyone at the same time. Worth bearing in bind (that’s a terrible DNS joke).
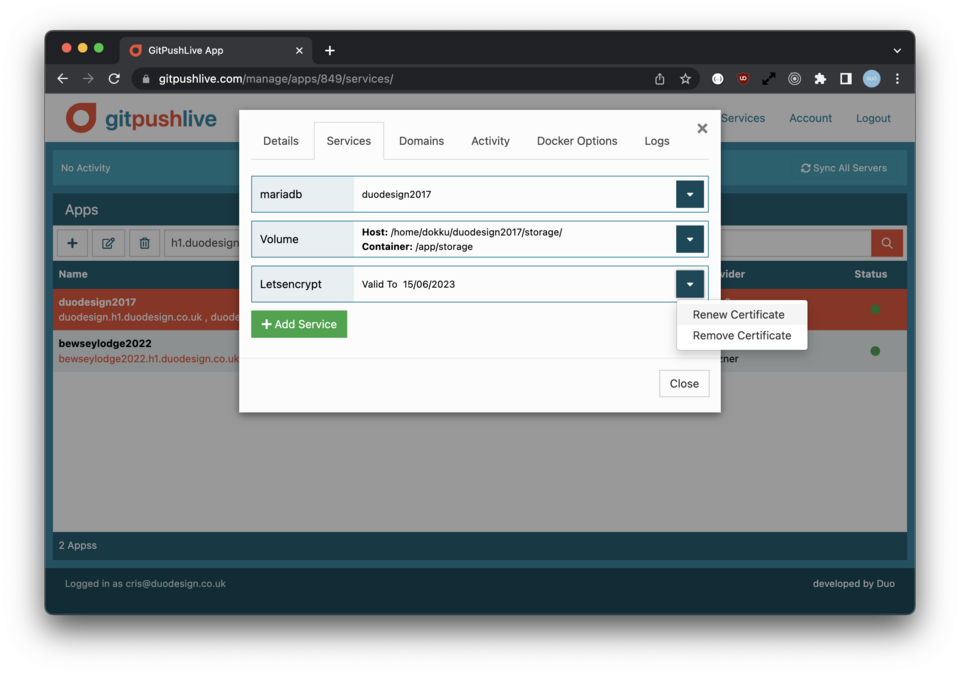
If you’re domain is using SSL, you should switch over to the services tab and either Add or renew the Letsencrypt certificate. You should only do this once the DNS has updated, as this process will fail if the domain hasn’t swtiched.