Notice
These documents are currently work in progress and describe a product currently in beta testing.
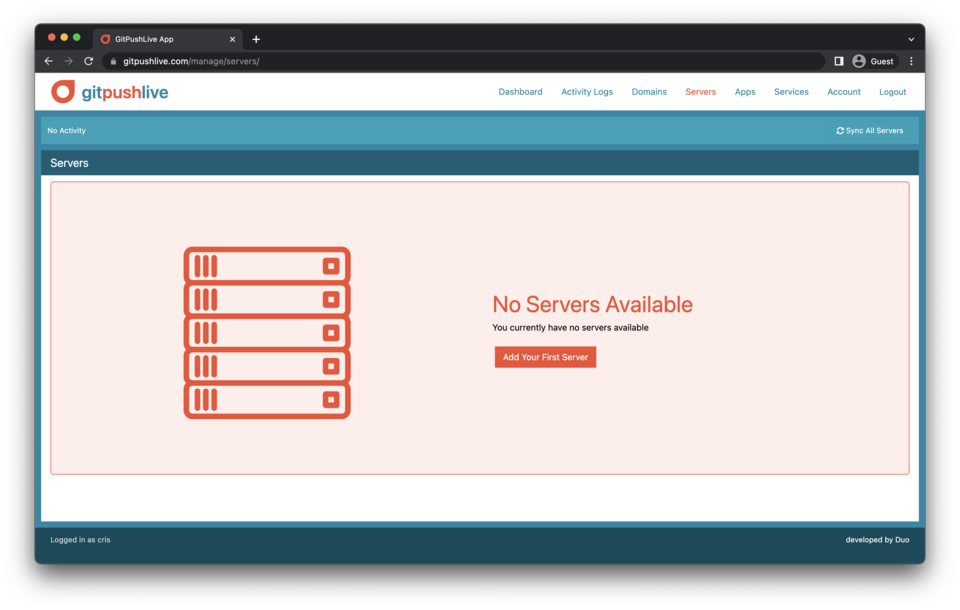
Servers
The servers section of the GitPushLive control panel gives you the ability to add and maintain your servers linked via the providers you have added. The below sections outline how you add and edit the servers, including the configuration of users and backups.
Adding Servers
 Click add your first server (note, you will need an ssh key included in your account be performing this step)
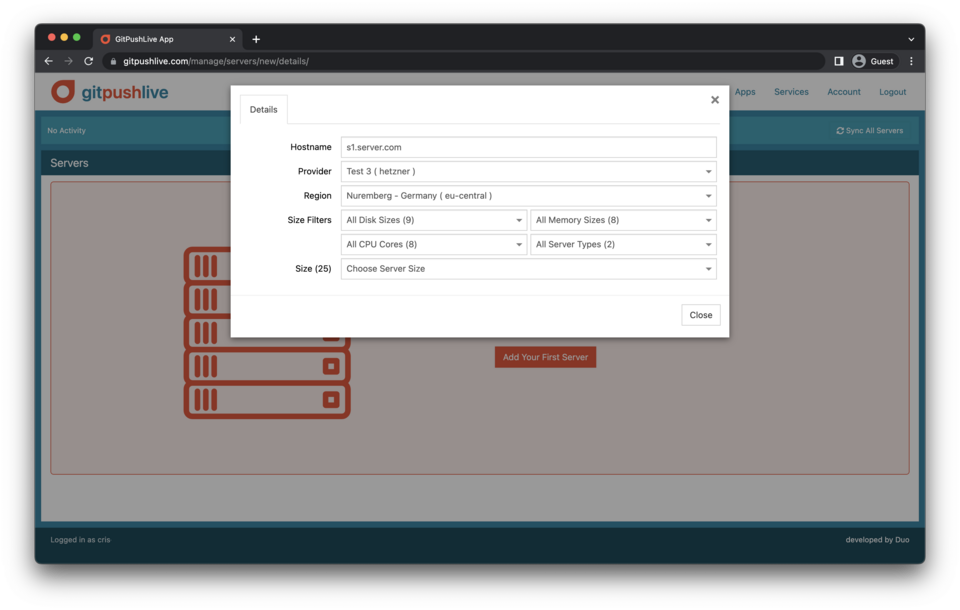 Once clicked fill out the details requested. You should ideally have a domain you can point at this server once setup, this should be added to the hostname field.
This domain will be the basis of your app domains eg yourapp.yourdomaim.com. Rather than buy a domain per server its much more economical to purchase a domain and point a subdomain at each server eg yourapp.server1.yourdomain.com. These domains will be how you access each of your apps before pointing the final production domain at them.
Depending on the providers you’ve added you’ll get different locations and configurations to choose from. We’ve added a set of size filters to help you find the configuration you’re after as many of the providers have lots of options.
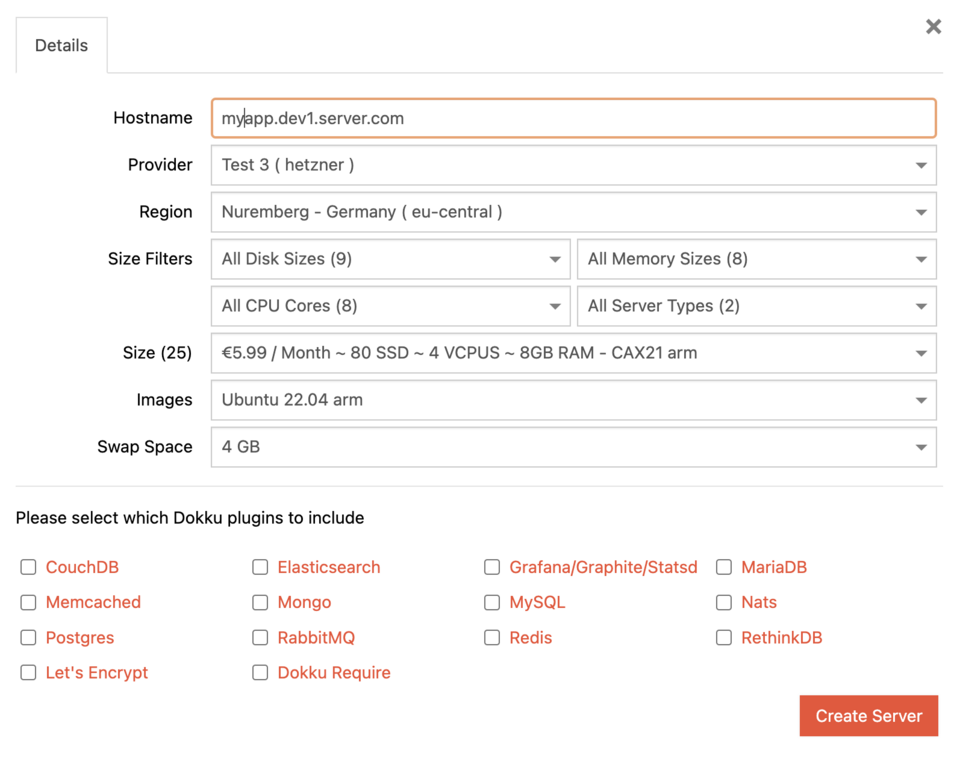
Once you’ve chosen the size, you should then choose which operating system and how much swap space to add (virtual memory). Finally we allow you to choose which dokku plugins to install. Each plugin in the list is linked to their github repos, so you can get a good idea of what they do and how to use them before you decide if you’d like to install them. You can add dokku plugins at any point in the future, so depending on the size of your server you may want to keep these to a minimum. Lets encrypt, for free https certificates, and a database you commonly use are probably a good starting point.
Once you click Create Server, the process should begin. First by contacting your provider and creating the server, then by installing the software and users linked to this server. The server should take around 6 - 15 minutes to complete depending network speeds, server speed and number of plugins chosen. We’ve included a progress bar to give you an indication of how long things will take. Your provider will charge you for any servers you add, as they would if you added them directly within their control panel.
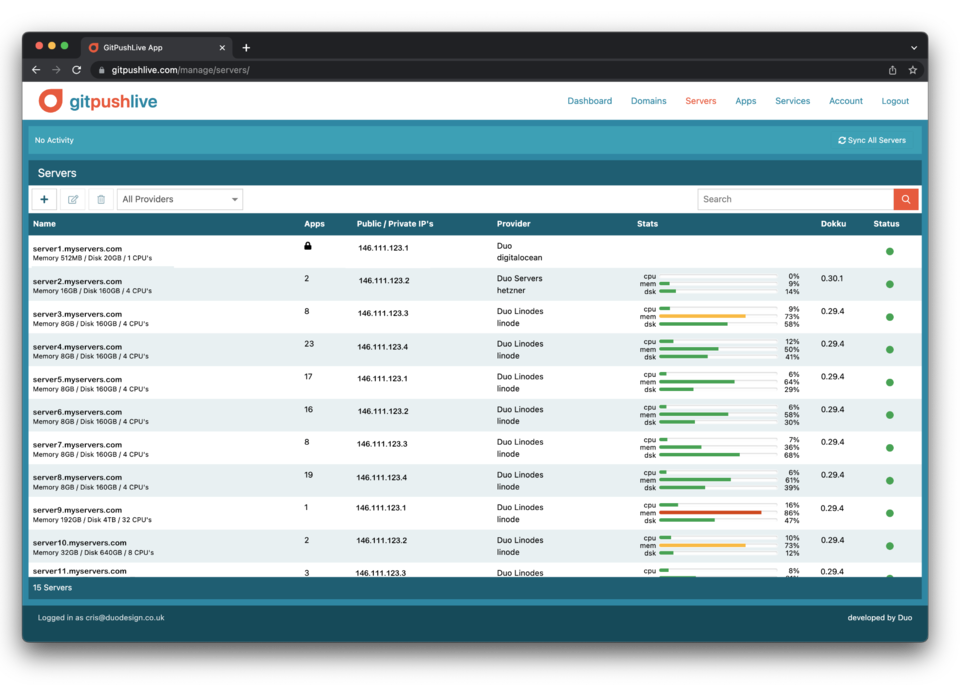
Server List
Once you have a running server it will appear in a list. This list shows lots of information for each server. The Stats column shows the usage for cpu, memory and disk as a percentage and auto updates every minute.
The servers with a lock within the Apps column are those which GitPushLive has no access. These can be unlocked by editing the list entry by double clicking or using the pencil icon, then following the instructions to setup ssh keys. As we install quite a few packages and make quite a few configuration changes its probably not a good idea to connect a currently used server.
Editing Servers
Editing an unlocked server in the list will give you a number of options. To edit a server, select it in the list, then click the pencil icon or double click the server.
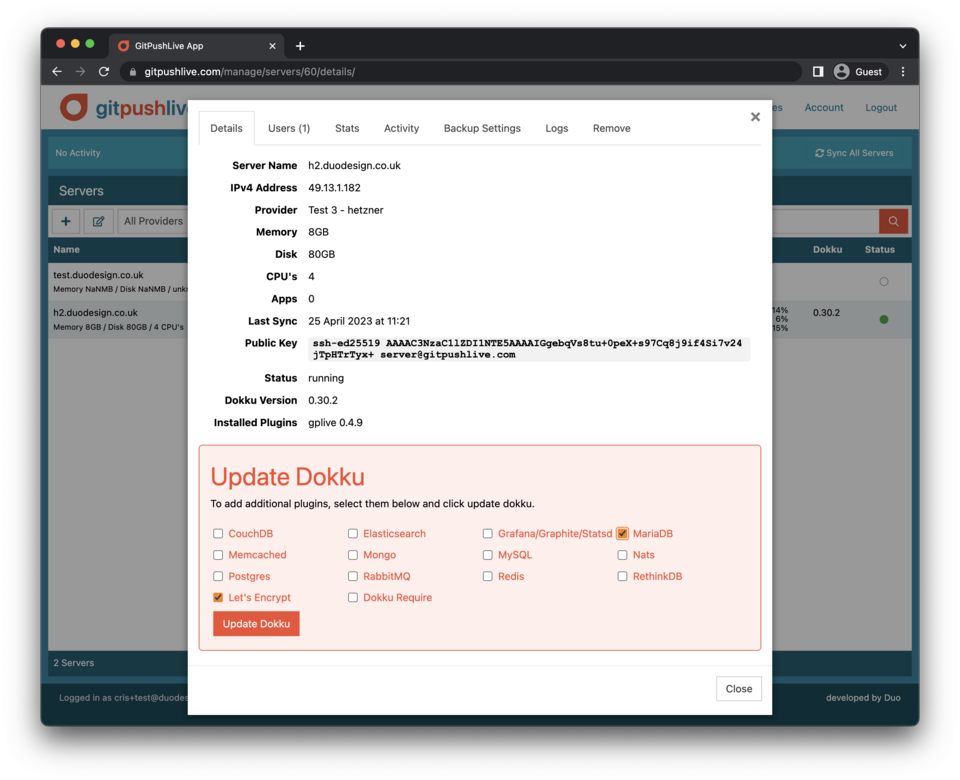
Updating Dokku Plugins
The first tab allow you to view various server settings as well as tick additional Dokku plugins to install them. Each of the plugins within the list can be clicked to view the relevant github page.
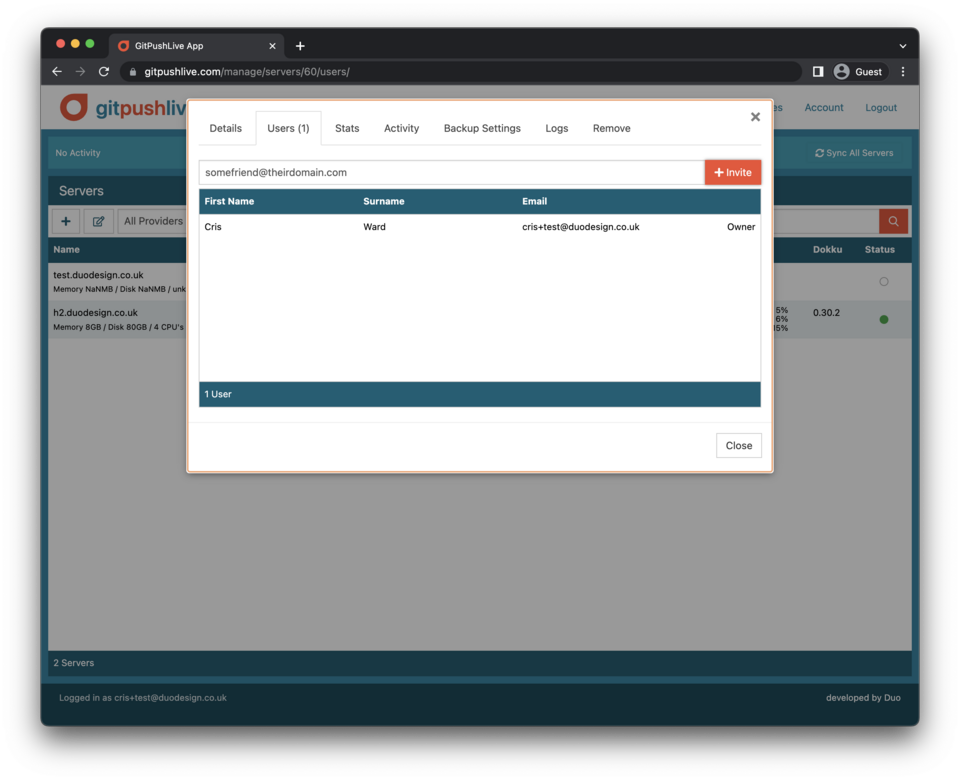
Sharing a Sever with Another User
Sharing serves allows another user to access your server and update and deploy apps. This can be achieved using the users tab. The invite process simply involves typing the users email address into the invite input and clicking invite. The user will then receive an email with a unique link. The recipient has 24hrs to click this link before it expires.
If the recipient already has a GitPushLive account they’ll be prompted to login. Otherwise they’ll be requested to signup for a free account.
Once accepted you’ll receive an email to let you know they are successfully sharing your server. They will then appear in the users list. To disconnect them from your server, you can click a small bin icon next to their name.
Server Stats
The stats tab within the server details displays the cpu, memory and disk usage information as sent to GitPushLive over the last 24hrs by your server. The key within this panel can be clicked to hide / show the various fields provided. The graph displays a 5 minute average of each stats to make it easier to identify patterns, as opposed to short lived spikes, though we do also include a raw minute by minute level for cpu. These graphs update in real-time, so if you’re monitoring a situation your can leave them open to watch how things progress.
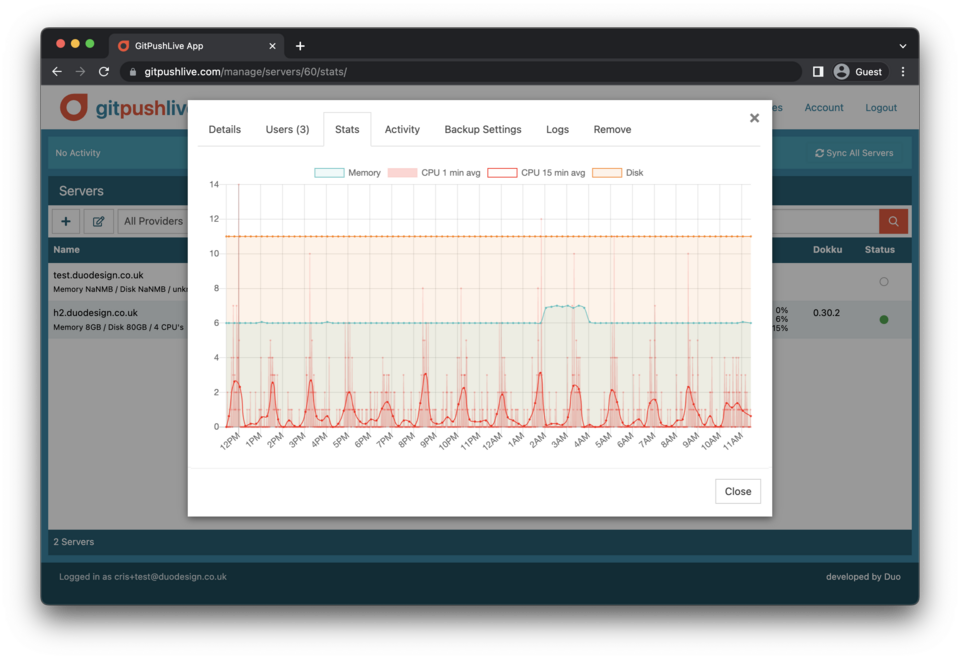
These stats aren’t intended to be a replacement for a detailed monitoring or app analytics, but are just a helpful indication of the health of your server. Running low on memory or disk space or a server constantly running at high cpu can be an indication you need to up-scale your server or spread your load across multiple servers. They also a handy tool for evaluating capacity, when deciding which of your servers to add new apps to.
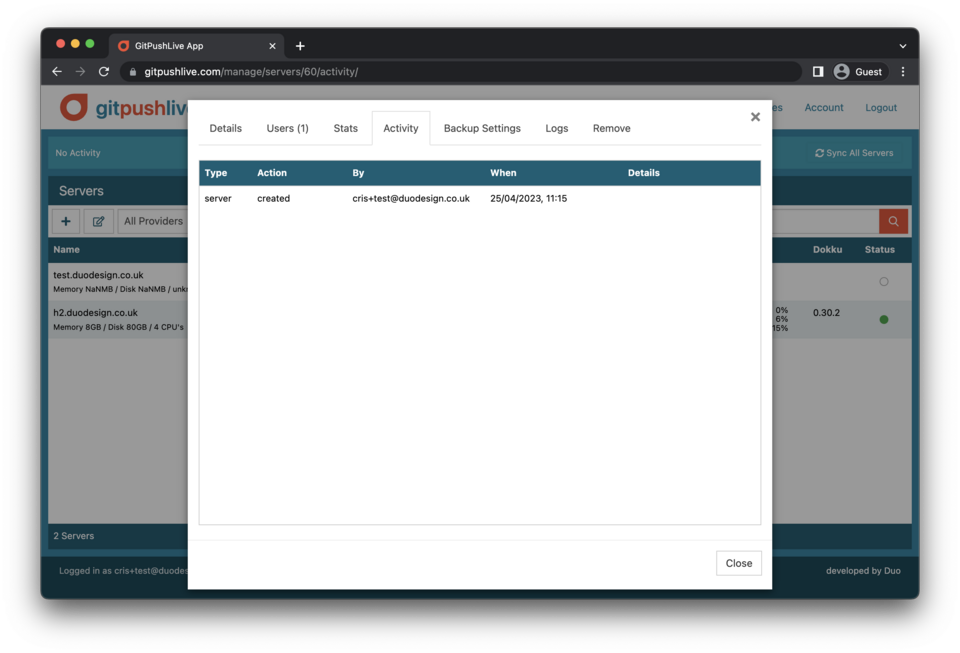
Activity Log
The activity log stores a record of various actions which have been carried out on a server. Although we don’t record everything we do log when servers are setup, linked, unlinked, deleted and updated with users and plugins.
This tab only shows activity for this server. For a full list of activity across all of your linked servers, see the main “Activity Logs” section.
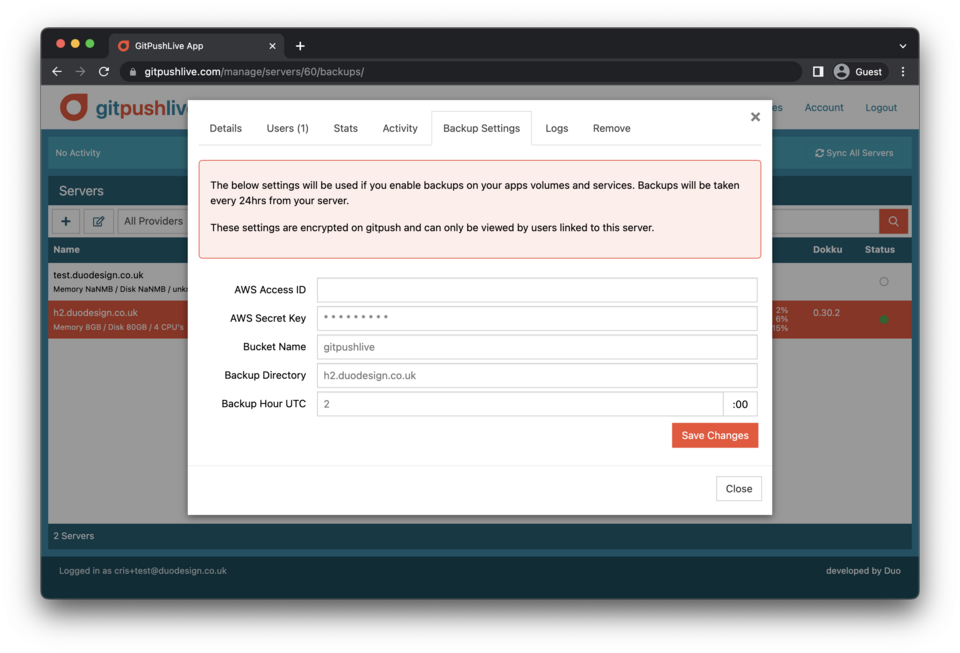
Backup Settings
These backup settings allow you to add an Amazon S3 access id and secret key, to allow your various app volumes and databases to be backed up once every 24hrs.
Many of the server providers also supply backup solutions. However, their solutions apply to a whole server, which isn’t always appropriate. It is often necessary to simply restore a single file, database or volume. The below setting combined with those in the application settings can enable this.
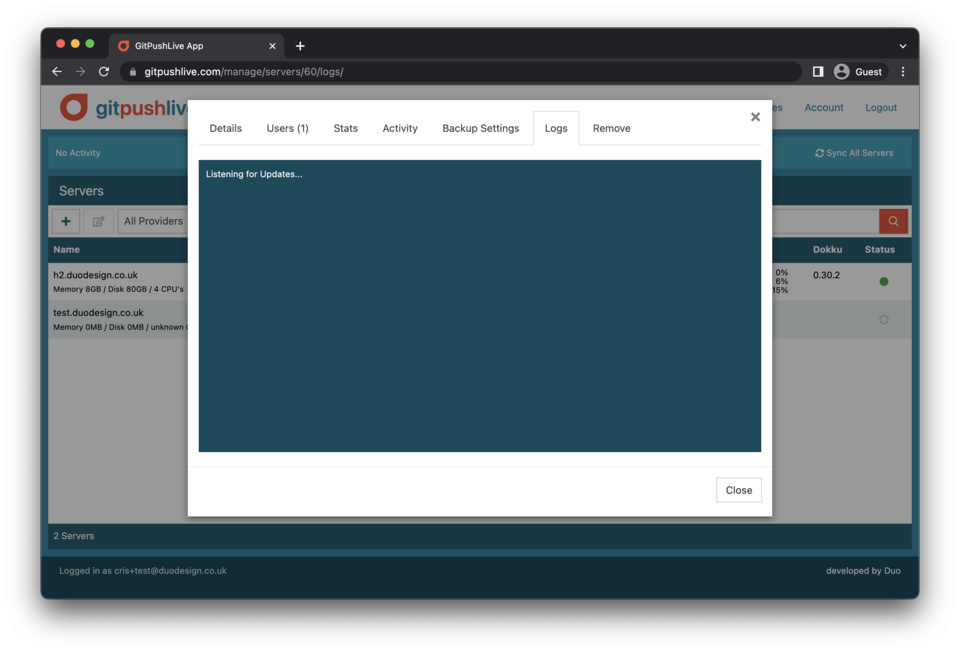
Logs
The logs tab shows live logs from your server. A small rotating arrow appears in the server list and within the logs tab whenever live logs are being shown.
The logs tab is useful to monitor install progress and plugins being updated.
Removing & Disconnecting Servers
The remove tab has 2 options. To Disconnect a server or Delete a Server. To use either of these you need to type the hostname of the server into the provided boxes. Typing the name is to prevent this feature being used accidentally.
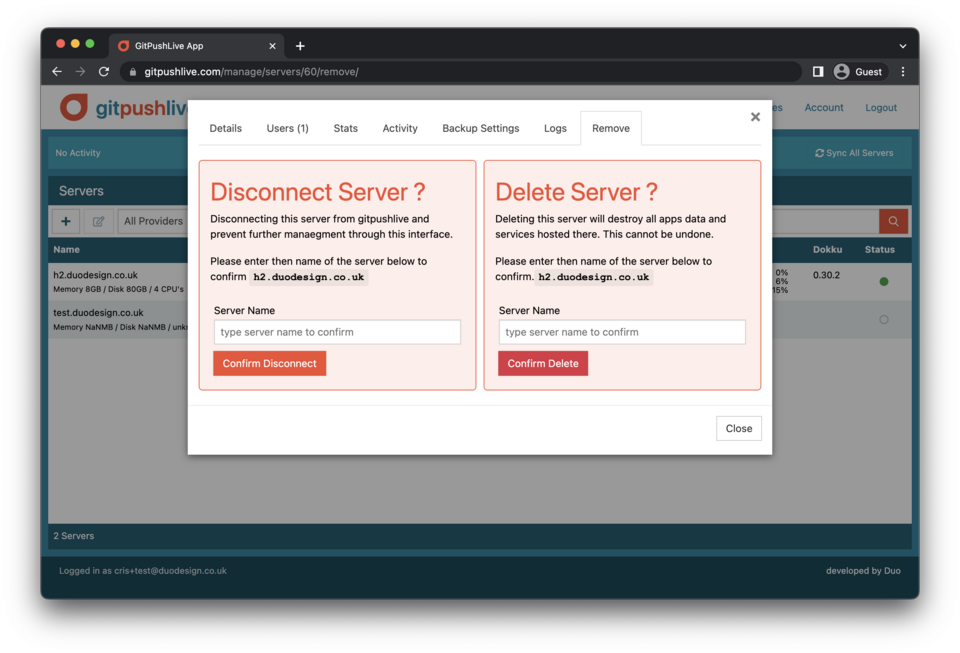
Disconnect a Server
Disconnecting a server will simply remove any GitPushLive control from your server. It will do this by
Removing our SSH key
Deleting the gitpushlive account
Disabling the gplive dokku plugin from sending stats.
It will however leave all other software and users in place. So you can carry on using and administrating your server on the command line. All your sites will remain running. Your server provider will keep on charging you for running this server, however your gitpush subscription will be reduced in-line with the number of servers which are now active at the end of the day.
Delete a Server
Deleting a server will do exactly that. We will call through to your server provider and ask them to delete the server. All apps, databases and files will be lost. This cannot be undone without recreating the server and restoring from whatever backups you have available.